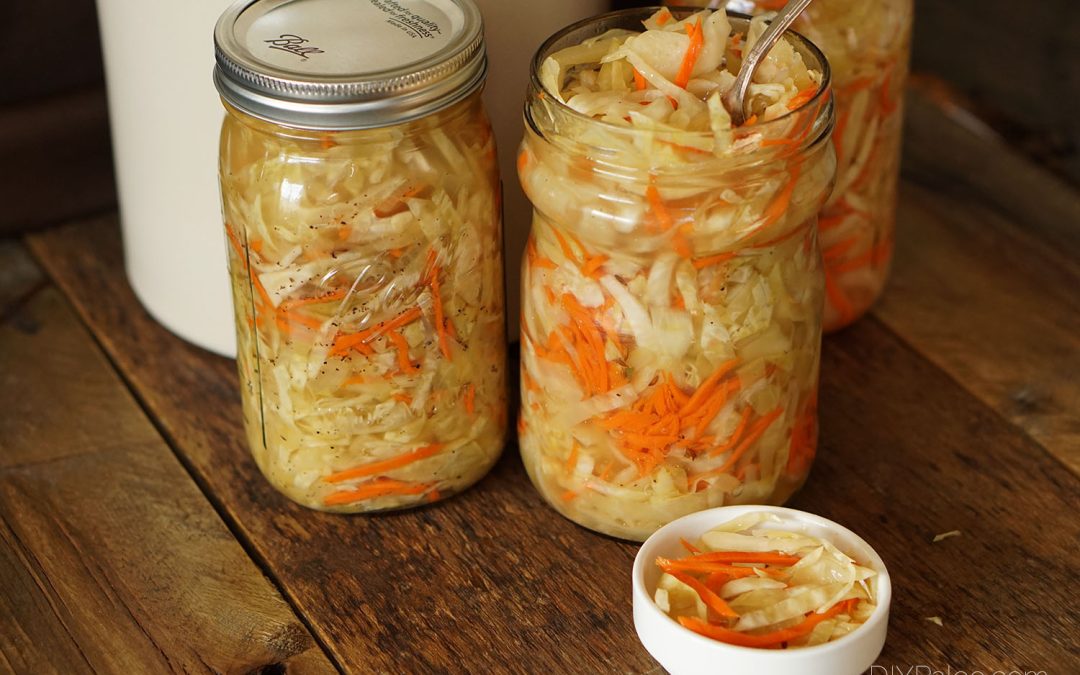
Artem is Russian (sigh, I’ll wait for your token Soviet joke…done? Okay, moving on). Having moved to Colorado when he was 12, now he really misses the food he grew up with while living in Kyrgyzstan (no, not Kazakhstan. Not Borat. Find a map). You’ll probably see a lot more Paleo-fied Russian recipes on this blog with time, but this is the first one: Russian sauerkraut, or kvashenaya kapusta.
The prep for this one is somewhat labor intensive, taking upwards of an hour to get all the veggies shredded and into the pot with brine and spices. It’ll take even longer if you shred your fingers on the mandoline, which I also complained about in this post. For some reason, Artem does not have this finger-shredding issue. This is why he is the hand model in all of the following photos: because if it were my hands, there would be far more blood and profanities in the process.
This isn’t, however, meant to deter you from trying a mandoline. It really is great for cutting veggies into those lovely matchstick shapes you don’t get by simply grating them. And it’s much more efficient than using a knife to cut everything into thin strips. Most mandolines come with some kind of finger guard, which is meant to keep your fingers on your hand and out of the veggie pile. Use it.
Anyway, I’m a big fan of home fermentation projects, and homemade sauerkraut is excellent for DIY probiotics. We eat a couple of spoonfuls of this kraut nearly every day. It always amazes me how well/fast food ferments without too much effort on my part. It usually goes something like this:
- Put vegetables in pot.
- Add salt water.
- Put lid on pot and wait a few weeks.
- DONE!
My preferred vessel for this project is a fermentation pot with ceramic weights. You could use a plate or a clean piece of wood with rocks on top, though. You just want the weight to compress the cabbage as it ferments so that more and more liquid rises to the top.
One last thing: watch out for mold. I’ve made this sauerkraut several times without issue, but there was one batch where I kept tasting the kraut every few days. I think the germs from my fork contaminated the kraut and encouraged mold growth. If you’re going to taste the kraut before it’s done fermenting, just be sure to use a clean fork—no double dipping.
Russian Sauerkraut
Ingredients
- 4-5 lb. cabbage
- 3-5 medium carrots
- 3-4 cloves garlic
- 6 cups water
- ½ cup olive or avocado oil
- 2 Tbsp. sea salt
- 2 Tbsp. coconut sugar
- 2 Tbsp. apple cider vinegar
- 4-5 bay leaves
- caraway seeds to taste
- ground black pepper to taste
Instructions
- Peel carrots and cut into matchsticks using the medium-sized blade of a mandoline. Set aside.

- Peel away the outer layers of cabbage, then cut out the core. Cut cabbage into eighths.

- Take the blade out of the mandoline and shred cabbage into long slices using the mandoline's large built-in blade. Larger chunks of cabbage are okay, but you don't want them too small (don't use a cheese grater!).

- Thinly slice garlic and set aside.
- To make the brine: warm water on the stove, then add salt and sugar to dissolve. Remove from heat and add oil and vinegar. Stir well.
- In a large pot (or fermentation pot), layer the cabbage, carrots and garlic with caraway seeds, bay leaves and pepper.

- Pour brine over the layered veggies. If using a fermentation pot, place the ceramic weights firmly down onto the veggies. Otherwise, press a plate or piece of wood onto the veggies until liquid comes over the top. Then place 2 rocks on the wood or plate.

- Put the lid on the pot and let it sit on a counter. Every 5 days, press down on the plate or weights to further compress the kraut.
- Kraut is ready to eat when the veggies are somewhat limp—it'll still be crunchy after 3 weeks, but I find it's best after 3-4 weeks of fermentation.
- Transfer finished kraut to glass jars (liquid, too!) and store in the fridge.


